How to make A dog bandana.
materials needed – fabric, thread
sewing machine, scissors, pins
level – easy
This easy tutorial gives you step by step instructions on how to make a bandana for your dog – this size is for a small puppy but can be adapted for larger size dogs.
1.  Make yourself a quick template using the measurements shown on this diagram.
2.  Cut two pieces of fabric out using your template. This picture shows the wrong side (top) and the right side (bottom) of the fabric I have used. Press both pieces.
3. 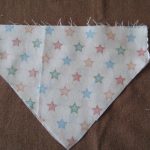 Place the two pieces right sides together and sew a seam (1cm) along the top edge.
4.  Fold the material out flat and press along the seam you have just made.
5.  At the same time, press a 1cm seam along the edge as shown in the diagram. Then sew a 1cm seam along this edge.
6.  Place the two pieces right sides together again and then sew along the diagonal edges from the base of where you have just sewn (so you are left with a small opening each side).
7.  Snip the end of the point (taking care not to cut your stitching) as this will make it easier when you turn the bandana the right way and you will get a nice crisp point at the end.
8.  Turn inside out carefully from one of the open ends, and using something long but blunt carefully push out the point at the end.
9.  Once fully turned out, press and your bandana is finished… Well nearly.. Just slip it through the collar!
To give the bandana a bit more of a finish you can top stitch along the top edge and along the diagonals (but not the open ends!). You can also sew along the horizontal edge from the bottom of the open ends so that the bandana doesn’t slip too much round the collar… Pic to follow….


